Defining Database Connection in Laravel With .env File

A way to define database connection in Laravel, is to define database details in .env file inside your root laravel directory. .env.example file will always provided in fresh installation of Laravel, when we install laravel with composer, .env file will automatically copied from .env.example. If you work in a team, it strongly recommended to only push .env.example because each developer have different configuration.

here an example of .env.example file

APP_NAME=Laravel
APP_ENV=local
APP_KEY=
APP_DEBUG=true
APP_LOG_LEVEL=debug
APP_URL=http://localhost

DB_CONNECTION=mysql
DB_HOST=127.0.0.1
DB_PORT=3306
DB_DATABASE=homestead
DB_USERNAME=homestead
DB_PASSWORD=secret

DB_FTM_HOST=127.0.0.1
DB_FTM_PORT=3306
DB_FTM_DATABASE=homestead
DB_FTM_USERNAME=homestead
DB_FTM_PASSWORD=secret

BROADCAST_DRIVER=log
CACHE_DRIVER=redis
SESSION_DRIVER=redis
QUEUE_DRIVER=redis

REDIS_HOST=127.0.0.1
REDIS_PASSWORD=null
REDIS_PORT=6379

MAIL_DRIVER=smtp
MAIL_HOST=smtp.mailtrap.io
MAIL_PORT=2525
MAIL_USERNAME=null
MAIL_PASSWORD=null
MAIL_ENCRYPTION=null

PUSHER_APP_ID=
PUSHER_APP_KEY=
PUSHER_APP_SECRET=

Editing .env File

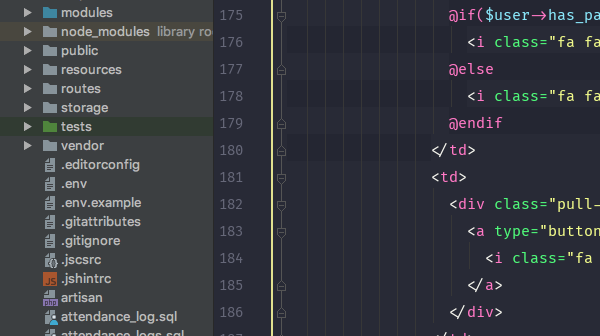
If you don’t fine .env file, you may to copy .env.example file and rename it to .env. don’t directly rename .env.example file except you work alone.

In .env file, you will find

....

DB_CONNECTION=mysql
DB_HOST=127.0.0.1
DB_PORT=3306
DB_DATABASE=homestead
DB_USERNAME=homestead
DB_PASSWORD=secret

....

DB_CONNECTION tell Laravel what kind of database machine you use, DB_HOST is the address of the database, because your database is in your local machine, so it will always 127.0.0.1 which mean is localhost. DB_PORT is your database port, by default, mysql will always use 3306 as it default port. DB_DATABASE is the name of your database, DB_USERNAME is a username that you use to login to your database while DB_PASSWORD is your username password.

Here the example of use

....

DB_CONNECTION=mysql
DB_HOST=127.0.0.1
DB_PORT=3306
DB_DATABASE=my_database
DB_USERNAME=root
DB_PASSWORD=my_password

....


Basic Use Of Laravel Model

Laravel model allows you to easily, and simply query, insert, update or delete your data.

before using Laravel model, make sure you have configure your database configuration inside your .env file.

Create New Model

to make a new model, simply type inside your terminal

php artisan make:model Customer

it will create a new Customer model file inside App/ directory. if you want to create your model inside AppModels directory, to be more tidy.

php artisan make:model Models/Customer

To generate database migration when you generate model, you can use

php artisan make:model Models/Customer -m

Specify Table Name

Is Highly recommended to use plural type of your model name when you give a name for your table, because Laravel model will assume that the table name of the model, is plural type of it name, so if our model name is Customer, that mean model will assume that the table is customers. So if you have different name, you may specify it with

<?php

namespace App\Models;

use Illuminate\Database\Eloquent\Model;

class Customer extends Model
{
        protected $table = 'customer_table';
}

protected $table is used to specify the table that associated with model.

Defining Allowed Column That Can Be Modified

Before you are able to modify your table, like insert a new record. you must to define it in your model with $fillable property.

<?php

namespace App\Models;

use Illuminate\Database\Eloquent\Model;

class Customer extends Model
{
        protected $fillable = [
            'name',
            'address',
            'phone_number',
        ]
} 

it mean, name, address and phone_number is fillable. If you have another column, assume it date of birth and you not register it inside $fillable property, it will not fillable when you try to insert a new record with date of birth parameter.

Using SoftDeletes?

With soft delete, laravel will create a ‘deleted_at’ column in your table. so when you delete your record, it will not actually delete your record, but it will fill date time in ‘deleted_at ‘. Every queried data using Eloquent model Customer:: it will query using where 'deleted_at' is not null. With that query, deleted record will not show in your queried data.

To use soft delete, you just need to add use SoftDeletes

<?php

namespace App\Models;

use Illuminate\Database\Eloquent\Model;

class Customer extends Model
{
        use SoftDeletes;
        protected $fillable = [
            'name',
            'address',
            'phone_number',
        ]
} 

Of course you have to use SoftDeletes in your migration to create ‘deleted_at’ column.

public function up()
    {
        Schema::create('customers', function (Blueprint $table) {
            $table->increments('id');
            $table->string('name');
            $table->string('address');
            $table->string('phone_number');
            $table->softDeletes();
            $table->timestamps();
        });
    }


Configure Your Space Indent With Editor Config Plugin (Php Storm)

When you write a code, pressing enter button in the end of line is a must. When the new line is added, for default it will also add a tabulation if that new line is a content of the first line. So how if you want to make it adding space indent instead of tabulation? how you do it is with editor config plugin.

Without editor config, every line will added by a tabulation:

<table class="table table-responsive tabel-kostum">
    <thead>
            <tr>
                     <th>Nama</th>
                     <th>Divisi</th>
                     <th>Unit</th>
                     <th>Jabatan</th>
                     <th>Status Aktif</th>
                     <th>Kelompok Shift</th>
                     <th>Passcard</th>
                     <th></th>
               </tr>
       </thead>

with editor config every line will added by 2 space instead of a tabulation:

<table class="table table-responsive tabel-kostum">
  <thead>
    <tr>
      <th>Nama</th>
      <th>Divisi</th>
      <th>Unit</th>
      <th>Jabatan</th>
      <th>Status Aktif</th>
      <th>Kelompok Shift</th>
      <th>Passcard</th>
      <th></th>
    </tr>
  </thead>       

so you don’t mess up with your code like this

img-1

instead, you will have tidier code like this

img-2

First let’s install editor config plugin, some editor like Visual Studio, JB Web Storm, JB Ruby Mine etc already have editor config installed, but here we will learn how to do it in JB Php Storm.

Go to Php Storm Preference, you will find plugin menu in the sidebar.

img-3

Click on Install JetBrains Plugin, and search for editor config

img-4

if you don’t see install button on description like mine, that mean editor config already installed in your Php Storm. so let’s check is EditorConfig is enabled or not, make sure that EditorConfig is checked.

img-5

after that create a new file named .editorconfig inside your root project directory

img-6

and fill it with this file configuration script

; This file is for unifying the coding style for different editors and IDEs.
; More information at http://editorconfig.org

root = true

[*]
charset = utf-8
indent_style = space
end_of_line = lf
insert_final_newline = true
trim_trailing_whitespace = true

[**.php]
indent_size = 4
indent_style = space

[**.blade.php]
indent_style = space
indent_size = 2

then you are finish. try to edit some code and see how the effect work. for more documentation, you can visit EditorConfig official site EditorConfig


What Exactly is Laravel Route?

you might wondering what is route and how it works. route is in charge of showing the way according to our request. so if we ask to open employees page, then his duty is to lead us there. route is divided into 4 parts, api, console, channels, and web. api route is used for API purpose, and for our purpose, that we will configure the whole way inside our web, we will use the web route.

Basic use of route

here the basic use of route :

to initiate route, you have to call the route facade with Route:: followed by the method, available methods for route is :

Route::get($uri, $callback);
Route::post($uri, $callback);
Route::put($uri, $callback);
Route::patch($uri, $callback);
Route::delete($uri, $callback);
Route::options($uri, $callback);

route method require 2 parameter, the first parameter is the string uri such '/landing-page' , this uri is what will we type in our browser www.mywebapp.com/landing-page. the second parameter is the callback, is what will happen if we type the following uri.

what exactly is laravel route

of course you will not call your program directly inside of route files. so you have to change the function in the callback with a controller.

Route::get('/show/profile', 'ProfileController@showProfile')->name('profile.show');

we see the different between the first route and the second route. the first route we use direct function for our callback while the second callback we direct it to showProfile method inside ProfileController. name method require one string parameter that will use to call the route

<a href="{{ route('profile.show') }}">Profile</a>

with {{ route('profile.show') }} it equal with you type /show/profile. so when user click on the link, app will look for route with profile.show name, and when it found, route will redirect it to the callback. that is how the route works.

RESTFull Route

Laravel is support RESTFull, mean when you create a new controller, it will automatically initiate 7 methods, index, create, store, show, edit, update, and destroy. beside you have to work hard creating the route for each methods, Laravel provided you with RESTFull route.

Route::resource('profile', 'ProfileController');

that resource method will provide all you need for RESTFull controller.

List Available Routes

to list available routes, you only need to type

php artisan route:list

if you have so many routes, you might want to filter it as a keyword you give by

php artisan route:list --path=route-name

path option will show the specified route as your path value.

Install Your First Laravel Project (With Composer)

Your First Introduction?

Composer is a dependency management tool for PHP project. it allow you to manage your required dependencies inside of your project directory, and provided you with easy update and installation of your dependencies. While Laravel is one of the most used Php framework.

Install Composer

First you have to copy the composer setup from it’s own website :

php -r "copy('https://getcomposer.org/installer', 'composer-setup.php');"

then verify it to make sure the file you’ve copied is not corrupt

php -r "if (hash_file('SHA384', 'composer-setup.php') === '544e09ee996cdf60ece3804abc52599c22b1f40f4323403c44d44fdfdd586475ca9813a858088ffbc1f233e9b180f061') { echo 'Installer verified'; } else { echo 'Installer corrupt'; unlink('composer-setup.php'); } echo PHP_EOL;"

then execute it with php command

php composer-setup.php

The command above will produce composer.phar, that is the file that will we need to use composer. after this installation, unlink your composer-setup file with

php -r "unlink('composer-setup.php');"

After that, move composer.phar to bin directory, so you are able to call it anywhere you want

mv composer.phar /usr/local/bin/composer

Install Laravel Installer

if you like to install laravel by simply type laravel install, then you’ll need to add Laravel installer to your composer. to do that simply type the following command in your terminal

composer global require "laravel/installer"

it will install Laravel installer inside your composers vendor directory. then if you want to make a fresh Laravel project, simply run

laravel new myApp

if you found that laravel command not found, it mean that you have not added yet composer bin path to your system path. so you need to register it first with the following command, ah FYI, the path might different, it might inside ~.configcomposer or ~.composer, so just adjust it as your composer path.

echo "export PATH=$PATH:$HOME/.config/composer/vendor/bin" >> ~/.bashrc
source ~/.bashrc


but if you use .zshrc, you’ll need to edit it directly inside .zshrc file. add composer bin path to export PATH line

inside .zshrd, so from this

export PATH="/usr/local/sbin:$PATH"

to this

export PATH="/usr/local/sbin:$PATH:/Users/zaki/.composer/vendor/bin"

after you edit it, make sure to run

source ~/.zshrc

to refresh your zsh configuration.

Install Laravel With Composer Create Project

you are able to install Laravel from composer too, to do it simply type the following command :

composer create-project --prefer-dist laravel/laravel blog "5.5.*"